A baseball pitcher doesn’t play every day his team does. He only intervenes on days when he is in the rotation of pitchers available to be used by the team manager. What deprives a pitcher of being able to participate in each game of his selection? The answer is: the intensity of your work .
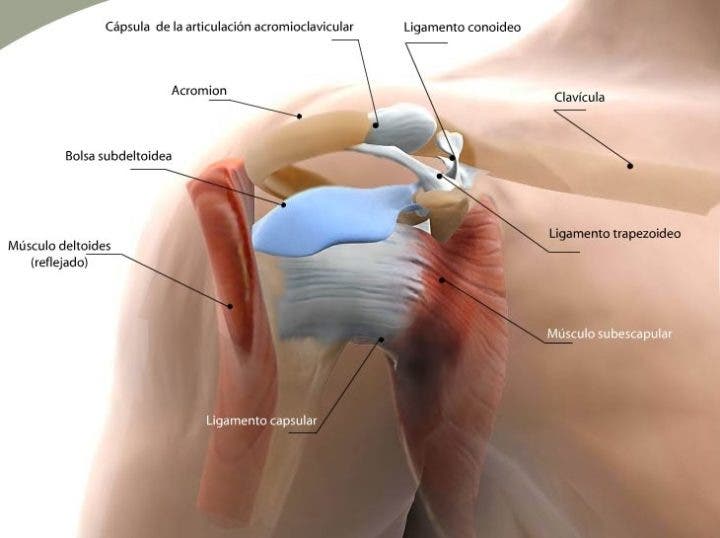
The action of throwing places a very high physical stress on the muscles and ligaments of the shoulder, elbow and wrist joints. Stress from which the body needs time to recover and which will be related to the volume and intensity of the previous work. Or more exactly with the number of launches he made.
But just as important as rest for recovery is the physical and technical preparation that the pitcher performs. Physical preparation gives you strength, endurance, flexibility, capabilities that allow you to throw with speed and control in your throws and to do it in a sustained way.
How to Prepare to Be a Baseball Pitcher
Many think that spending hours in the gym lifting heavy weights and building muscle mass is enough. Muscular strength is certainly very important for the pitcher, but when training it must be remembered that your body is like a chain and every chain will be only as strong as its weakest link. A very common mistake during pitcher setup is forgetting to work on the ligaments and small muscles .
In pitchers it is very rare to find injuries to the large muscles. The vast majority of injuries occur to the small muscles and ligaments. To strengthen the small muscular planes, small weights are used that allow a greater possibility of joint mobility. This work is known as Anatomical Adaptation (AA) and must precede any intense work with heavy weights.
In the case of pitchers, it is an inseparable part of their training. The goal of AA is to prepare the muscles and the muscle attachments to the bones to withstand the high loads they will be subjected to during the later phases of training and competition. It is important that during the AA period the load is not so high that it can cause pain, especially in the joints. Unlike muscles, joints should not hurt during exercise. If you feel pain in a joint then stop the exercise immediately.

There are several means to execute this type of training such as working with leagues, medicine balls, training in the water or dumbbells (in baseball, dumbbells are known as Dumbbells). Here are some examples of how to use dumbbells in pitcher training.
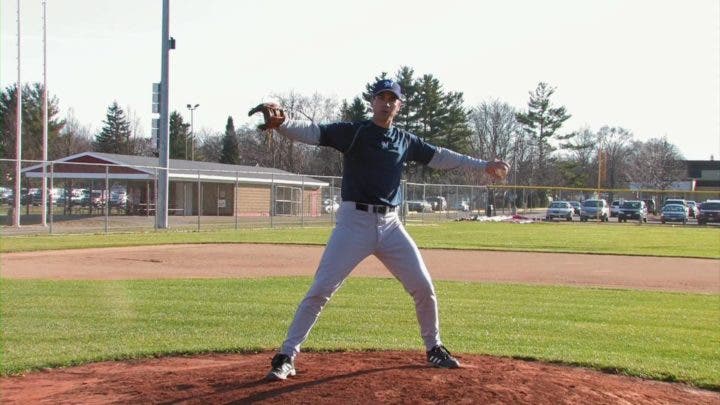
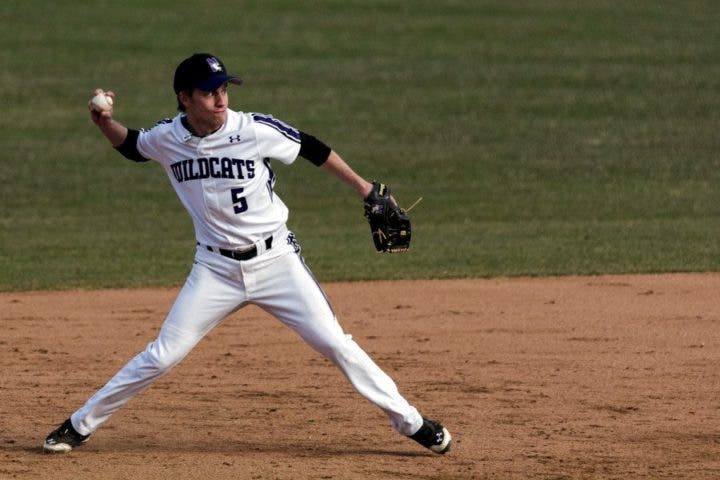
Before starting with the exercises it is important to know a position that is used as a starting point for many of these exercises because it is a position that the thrower adopts during the execution of the throw. Her name is T-Flexed.
The T-Bent position is an ideal position for the shoulder and elbow joints, where the elbows are:
- At shoulder height and slightly in front of them.
- Lined with the hips and metatarsals.
Dumbbell Exercises for Baseball Pitchers
The dumbbells should be between 3 and 10 pounds (1.5 to 5 kg approximately), exercises will be performed with sets of between 5 and 15 repetitions and with little or no rest in each exercise. The linear and rotary movements should simulate the position of the forearms for the different throws (straight, curve and change of speed) through a specific range of movement of the elbows and shoulders.
- Begin with the elbows, shoulders and weight in the T-Bent position, first extend the arms linearly, then upwards and alternate the palm of the hand inwards and once outwards.
- Arms extended to the sides of the body , bring the right hand to the left shoulder and the left hand to the right shoulder. In this phase the palm of the hands will be up when you transfer the hand up and down when you transfer the hand down. After completing 5 to 15 repetitions, reverse the position of the hand during the movement. The palm will go down when the hand goes up and vice versa.
- Start with the dumbbells held behind your head , elbows and shoulders as high as possible. Alternate fully extending the arms, the hands should be slightly in front or behind the head never on it. Then do two more sets, one rotating the palm inward and the other outward.
- Weights to the sides, extend the arms to both sides with the hands at shoulder height (5-15 repetitions) then do three more sets, first with the thumbs up, then down and finally inwards.
- Dumbbell in front of the groin, extend the arms over the head to both sides (The body appears to be an X). The shoulders and lower back should be extended when the dumbbells reach this position (5-15 reps). Do three more sets, thumbs up first, then down, and last inward.
- Start with the dumbbells at groin level, then bring them to chest level and extend your arms to the T-Bent position, keep the dumbbells slightly in front of the shoulders and arms extended at shoulder level. Do it first with the thumbs down, then up, and finally inward.
- Dumbbells at groin height, simulating a mill, bring the dumbbells to a position above and in front of the head, they should touch each other and the arms should be extended, gently return to the starting position, the palms should rotate towards down and out, then thumbs up, down, and in.
- With the trunk flexed and the dumbbells touching the floor alternate bringing the dumbbell up to the shoulder while the other is on the floor (5-15 repetitions). Do two more sets, one thumb forward and one back.
- With the trunk flexed, the dumbbells almost attached to the front and arms flexed first bring the elbows up to shoulder height and then extend the forearms out until they are parallel to the ground, hold the position and then return to the starting position, repeat thumb up, then thumb down.
- Weights to the sides of the body, palms back, first raise the arms to shoulder height with the forearms flexed at a 90 degree angle, extend the weight up and forward to the T-flexed position and return to the starting position step by step in reverse, thumbs up, then thumbs down.
- Start with the dumbbells at head level with elbows and shoulders in T-flexed keeping elbows and forearms parallel to the ground, turn the dumbbells forward to shoulder height, stop and return to the starting position, do it thumb up and down.
- The throwing arm dumbbell with the hand above the head and the thumb pointing backwards, the elbow at shoulder height, the other hand with the dumbbell with the thumb down at the height of the hip and in front of the body, alternate dumbbell positions in an X shape.
Conclution
These exercises will help you improve your pitching in baseball. You can do other exercises similar to these; but you must always keep in mind the principle of relating the drill to the movements that the pitcher executes to throw. Remember, dumbbell exercises for pitchers are specific work that renews blood flow to the connective tissues and small muscle groups before the large muscles kick in. Therefore exercising frequently with them helps prevent injuries and increases the pitcher’s athletic performance.
References
For this work, the author used his personal experience as a coach and a large bibliography consulted, among which the following stand out:
- Bompa, Tudor O. Periodization of Sports Training. Editorial Paidotrivo. 2000
- House, Tom. Fit to Pich. Human Kinetics. nineteen ninety six
